How to Build a Stretcher Bar Frame and Stretch your Canvas

How to Gesso Your Canvas Or Panel
Composition 101


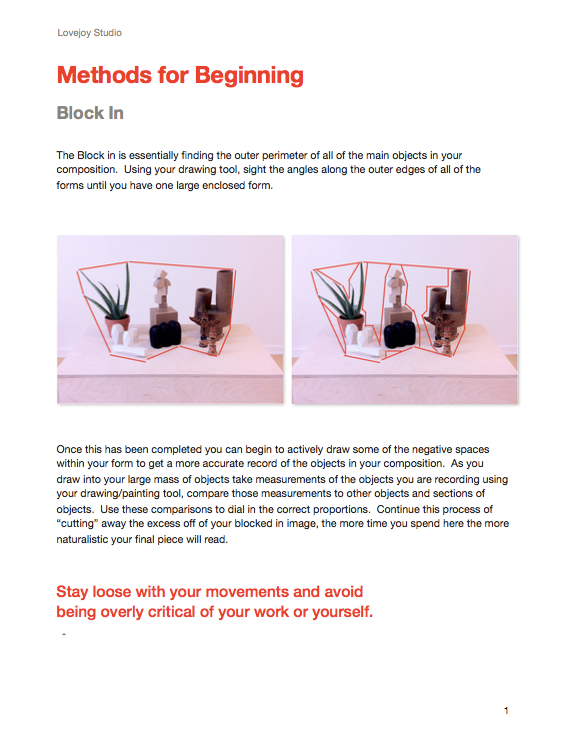
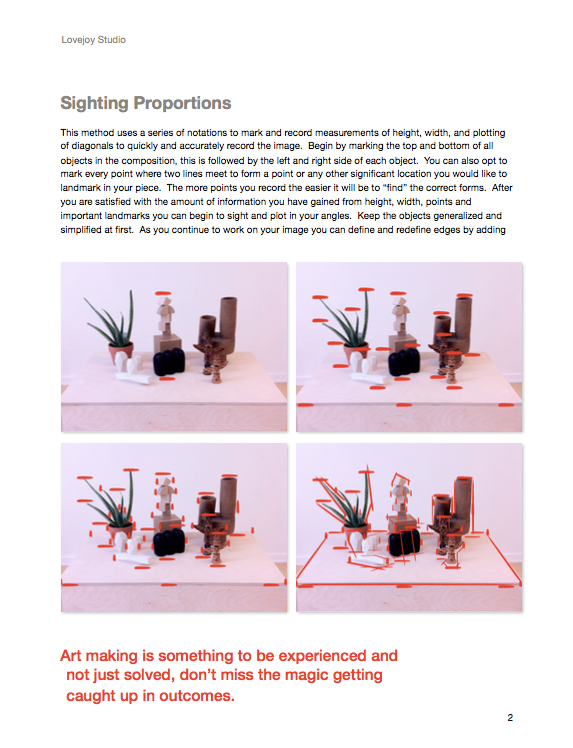
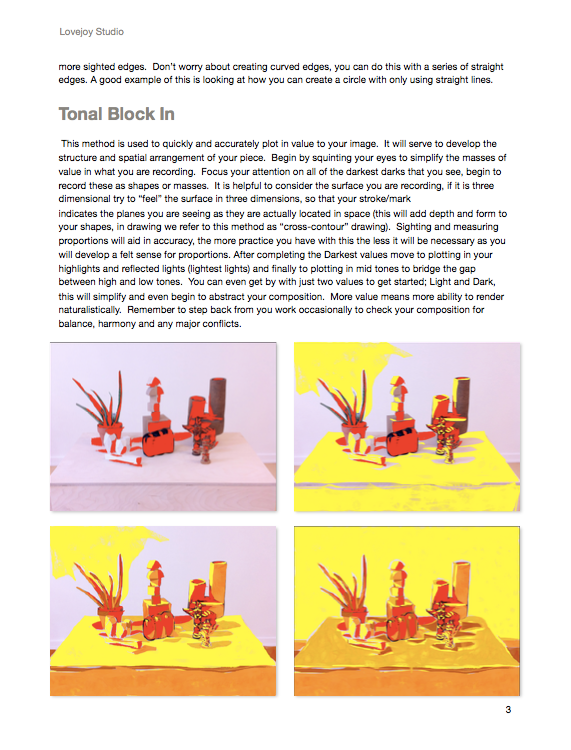
Beginning Your Drawings
Drawing Technique Chart & Video Tutorials

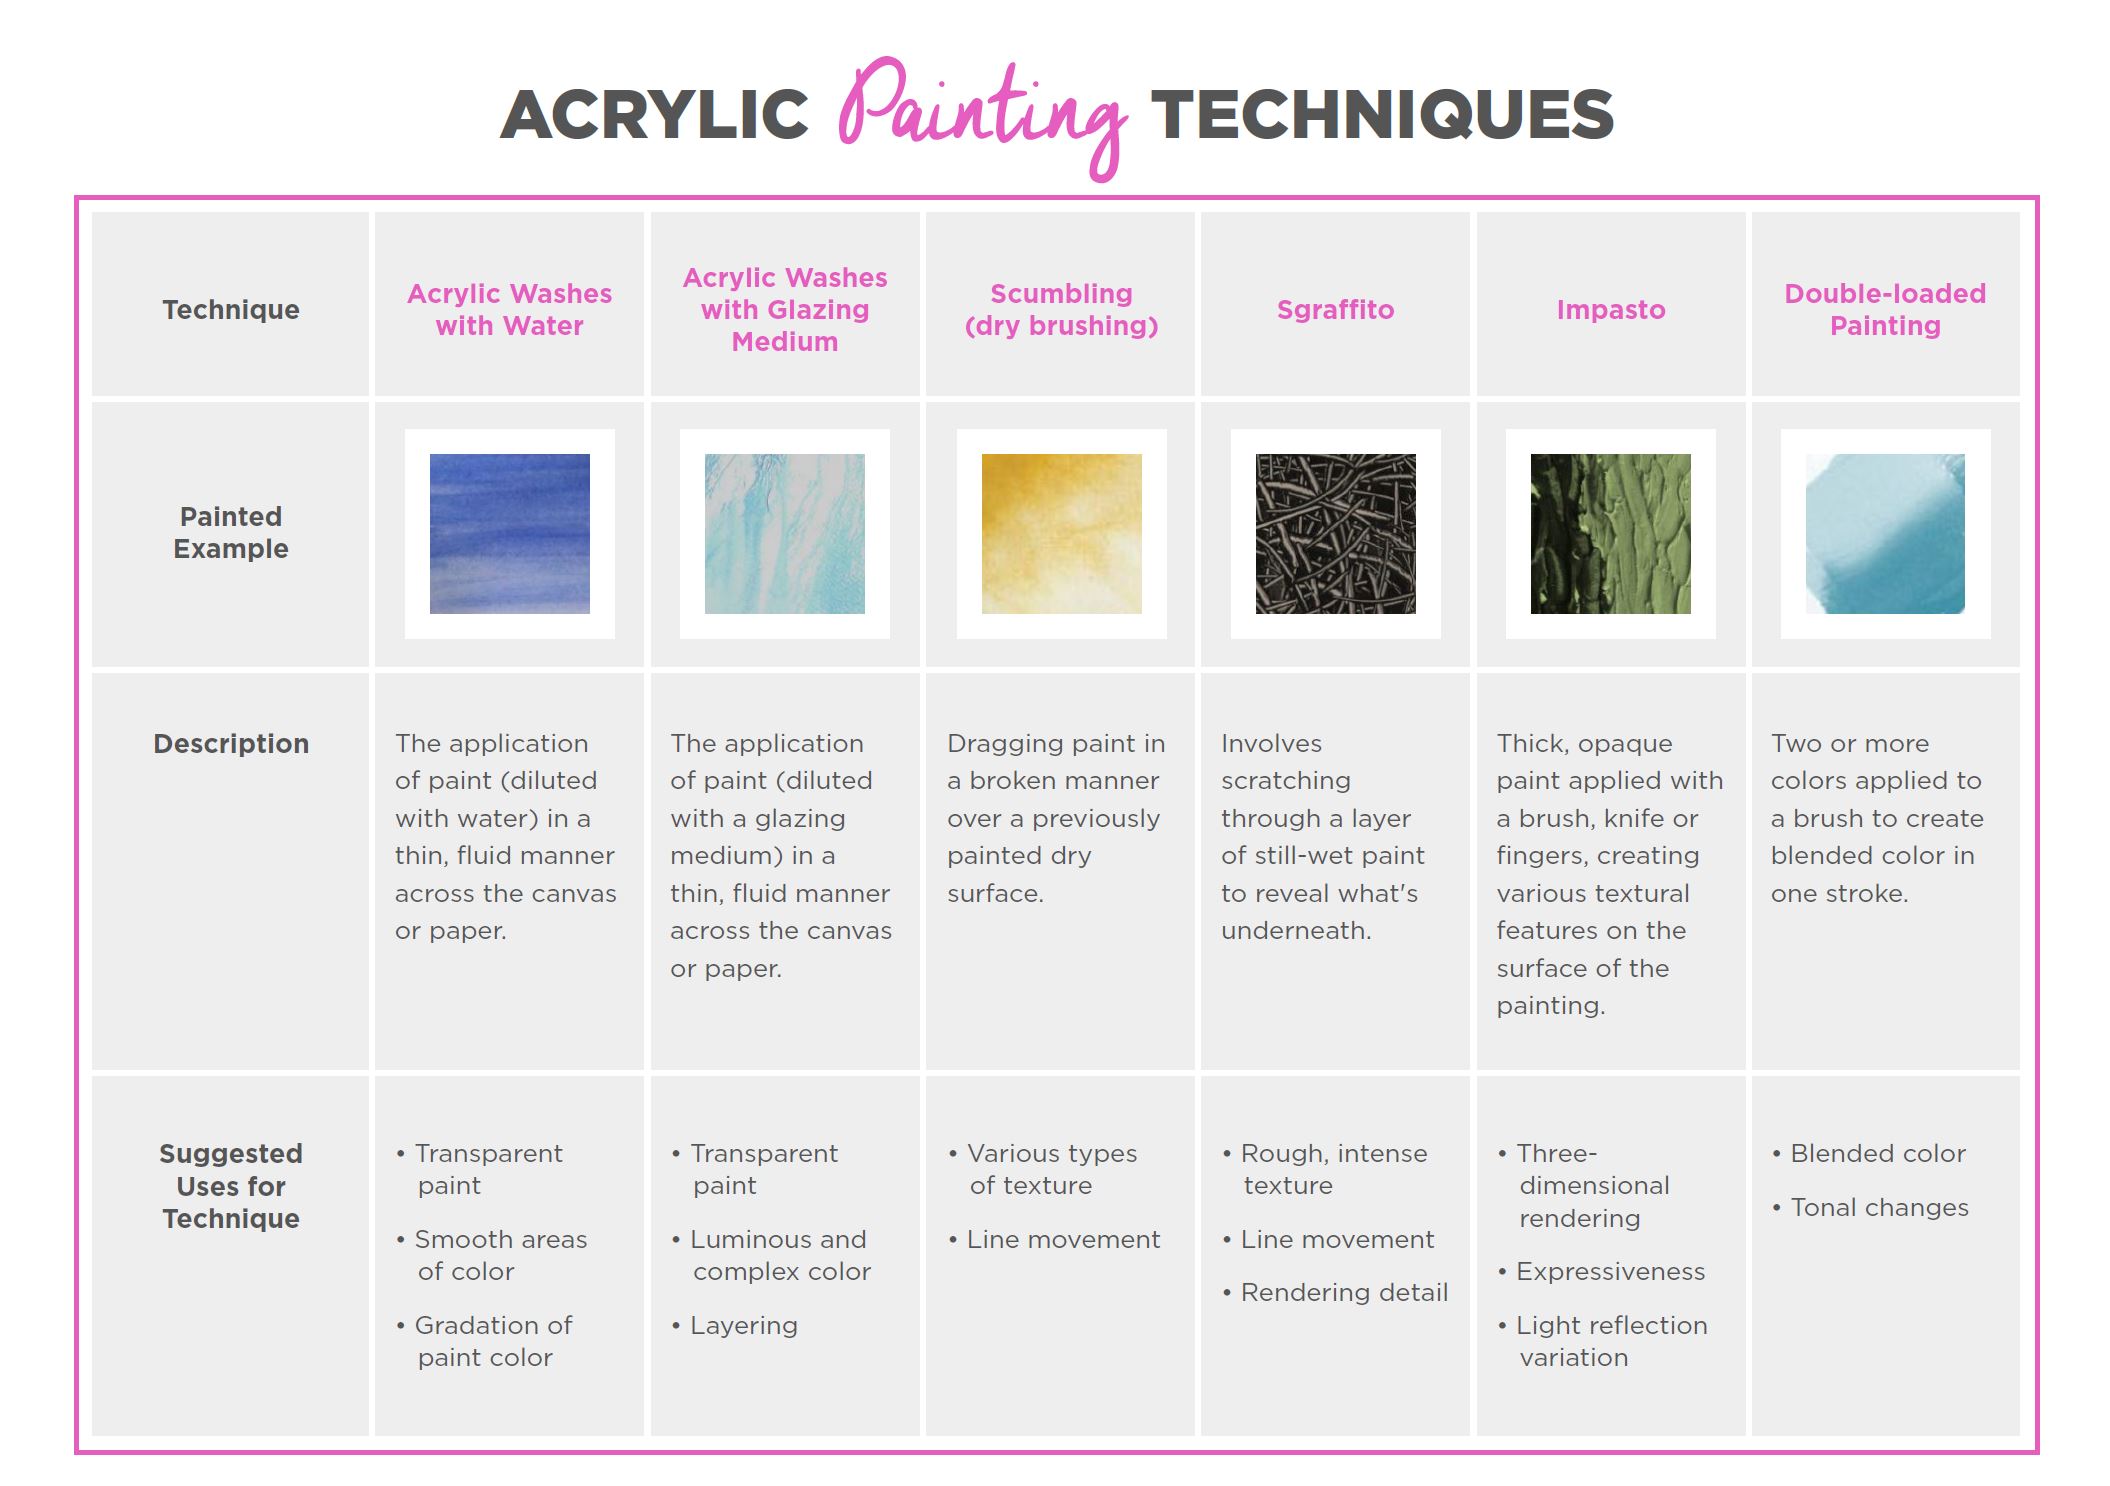
Acrylic Painting Techniques Chart & Video Tutorial
Underpainting Information
Why Bother with an Underpainting?
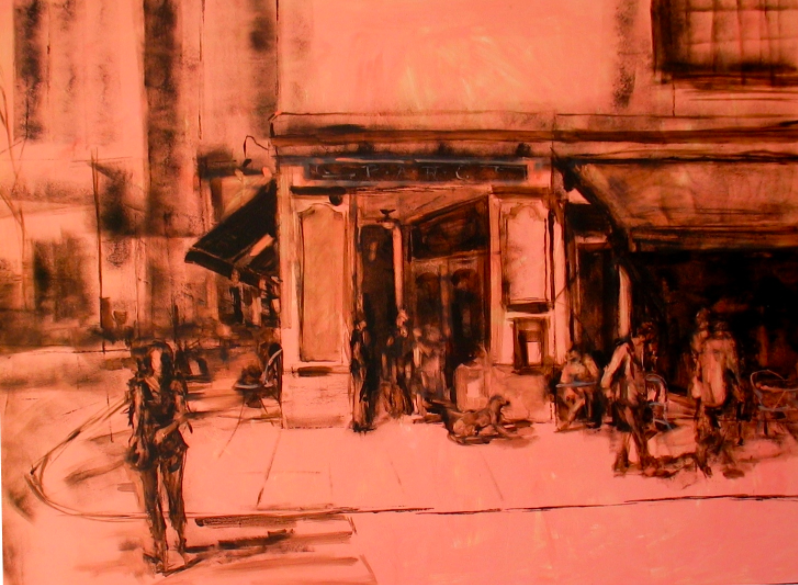
I found the following images on Anne Kullaf's Blog Loosen Up. It is an excellent example of underpainting and the development of a painting.
This first image shows an incomplete underpainting that resolves issues of proportion and begins to address value. This underpainting was done using a tinted ground (gesso and some light red ochre) and burnt umber. The values are beginning to be established by the use of washes to block in medium and light values and an undiluted application will block in the darker values.
Notice in this slide the underpainting is blocking in the rest of the background information. Underpaintings are meant to establish a firm structure for your painting but do not need to be resolved and finished in the same way that a finished painting is finished. Notice how loose and gestural the figures and marks are.

This slide illustrates the initial blocking in of color. Notice that we are working with large simple blocks of color or shape, always work from large simple shapes down to smaller more complex shapes. Resist the urge to jump into details.

More color is being introduced. Notice that the artist is starting to work into smaller shapes and that some areas of the underpainting are showing through. You do not have to always use a neutral color but you can see here why it may be helpful because it is harmonious with the palette being used. Imagine if the preliminary underpainting was completed in a bright red or neon green and imagine the effect that might have.

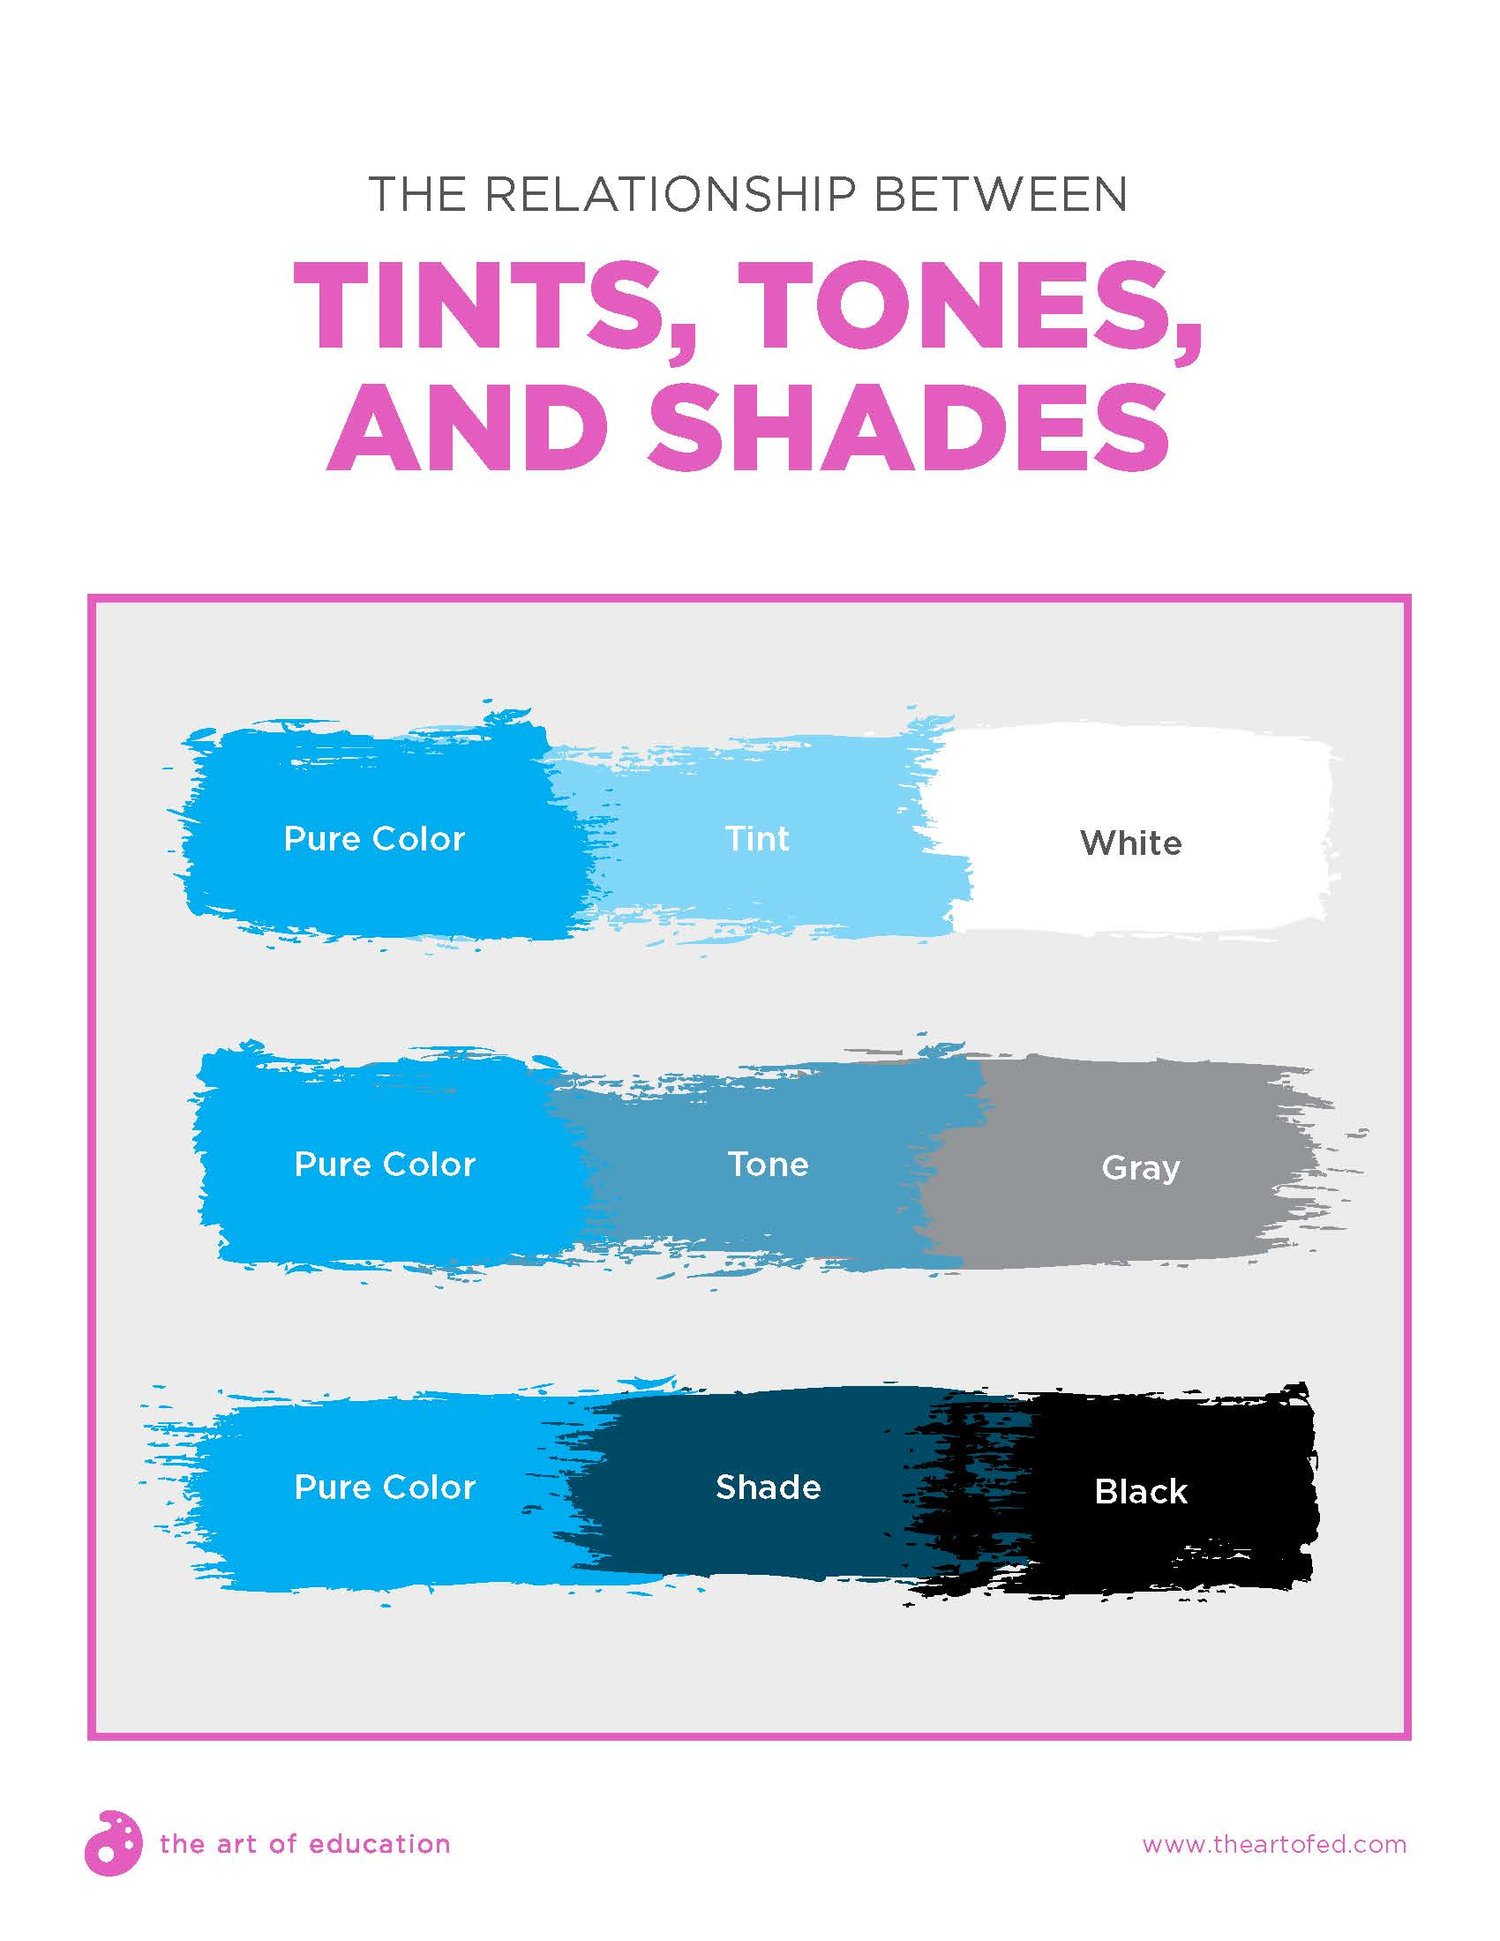
The artist is continuing to refine the painting and developing a nice range of values by mixing tints tones and shades of color. Edges are being cleaned up and objects are brought to a higher level of clarity.

This is the finalized painting. At this point, the artist has provided "eye candy" using fully saturated jewel-like colors to add details like the lettering in the sign for the restaurant.

This is a detail of one of the figures in this painting. This is a wonderful example that sometimes less is more. The face of this figure is merely suggested through tonal variation as opposed to being meticulously rendered. As an artist, you will have to make decisions about how much information to supply the viewer. This is an extremely useful tool to guide the viewer's eye around your work.

